Sunday, April 24, 2016

Spring nails


You know I’m crazy about spring and I want to celebrate it with colorful clothes, proper beauty products and, of course, new manicure that reminds me of spring.
So I decided to make  some gel nails decorated with water decals technique.

Those are the things I used for my nails:
-nail polish remover with a cotton pad
-nail file and buffer
-cuticle remover (that metal stick)
-nail wipes
-nail primer and bonder
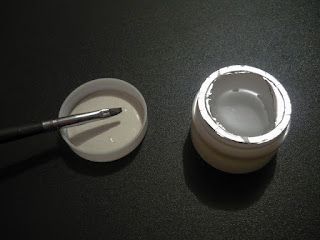
-clear tips, nail glue, nail trimmer, construction gel and a flat brush
-nude nail polish
-a cup with water (at room temperature), scissor, tweezers and a paper napkin
-top coat
-cuticle oil

Let’s get started! ;)
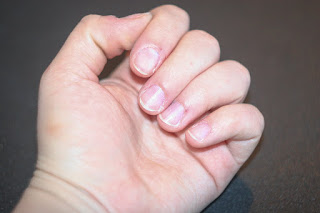
You can see my nails are pretty dull, short and painted with purple nail polish...just boring!

I started by removing the nail polish.
   

Then I  gently pushed back my cuticles and I cut them using a regular nail scissor. 
 
I know many won’t agree with cutting the cuticles, but this is how I like to do it (and I can tell you I don’t harm my nails by any means). 
 
Next I filed my nails (taking care of the edges!) and I used buffer gently for my nail surface. After I filed all my nails , I took  a nail wipe and I cleaned off the nail dust. 

Now I was prepared to select and glue on the tips. 
 
I’ve started by selecting the tips that matched with my fingernails size and then I glued them on to my nails. 
When I had all the tips on I looked like a crazy cat! :D

Now for the part I hated the most! It was time to cut and file the tips. Such a boring work...and was a lot of work.
 
                                                                                  Fun fact: this is how much I had cutted of the tips

I also filed the surface of the tips until I couldn’t felt the transition between my natural nails and the tips.

I wiped the dust again, I applied the primer (not touching my cuticles) and then the bonder.
BE CAREFULL TO NOT TOUCH YOUR CUTTICLES WITH PRIMER! If you have any skin lesions and you put primer on it will burn like hell for a couple of seconds!

Now for the fun part: applying the gel.

I used three layers: the first one only on my natural nail surface and with  the other two I created a bridge between my nail and the tip. 
I cured every layer for two minutes using my UV lamp. 

After all my fingernails were covered in gel I wiped off the sticky layer (and I looked over to see if there were any gel bumps to file off-luckily there weren’t ) and I painted every nail with two layers of nude polish.

Finally, the water decal technique!
 

I cut the foil with nail designs one by one (trying to match my nail size with the foil) and then I put the foils (one at the time) into the water and waited for about 20 sec (I counted :P).


Then I took the foil, wipe out the exces water using a paper napkin, gently pull off the design with my fingers and place it on the selected nail and  I added my favorite top coat on!

  
With an orange stick I cleaned my nails (and under my nails) off the exes foil. 

For the final touch I put some oil onto my cuticles and that was all!
       
   
Before and after


I’ve worked like three hours at my nails but I think it’s worth it! Now I have the perfect nails for this spring! 

Balea Bodycream


Goodbye winter, hello spring!

I’ve waited this season for so long and now is finally here! No more cold weather, no more snow and no more red, running nose! Yesterday, when i was  shopping i’ve decided to do something to celebrate the spring. So i gave myself a task: to find the best beauty product that reminds me of spring. I was in a lot of shops and i found a lot of stuff (products with flower inspired packaging,  cute colors nail polishes, fruity smelling perfumes...) but nothing special, nothing out of ordinary...i was feeling down.

Then i saw my favorite shop and i decided to enter. After all  I needed was some relaxation....and some hand cream. I searched a lot and i didn’t know what to choose. In the end i’ve decided to buy a bodycream with argan oil and i left. But when i arrived home and i opened the box container, i smelled the cream...and all my dreams came true! I could smell spring and it was divine! After all, my day was a good one!

 I bought my bodycream from a “dm” shop (“dm” is a chain stores in east Europe. Here you can find beauty products, health care products and even some healthy food). It’s made by Balea brand and it’s with shea butter and argan oil so is amazing for dry skin!  The jar (is literally a plastic jar) is BIG (500ml). A lot of cream! 

As  i said, when you open the container the smell punch you in the face (nose :P). Is a sweet-flower-fruity smell, i’m not very good at describing it....it smells like spring! And the best part is....the smell stays on your skin after you apply the product! Yeyyyy :D

The second part that i find very interesting (and i like a lot, of course!) is that the color of the cream is not ,,sanitary white” (like most of them), is just a very light beige. I told you is a special thing...well at least for me is a special thing...

About the consistence, i can tell you that this bodycream is very soft and light (not greasy when applied). It’s absorbed  very fast and your skin becomes very soft and moisturized in no time.


All in all i truly believe i found my favourite beauty product for this spring...and for this summer maybe. We will find out!

You can buy this product from a dm shop, or form Amazon, using this link:
Balea

Saturday, April 23, 2016

ColourVUE Contact Lenses


Great news! I bought my first pair of circle contact lenses! :P
I found them on sale (15$) and i bought them. I still can’t believe it. It’s so hard to find circle lenses in my country! But i’ve did it!

Mine are from ColourVUE and the color is Sweet Honey (ColourVUE BigEyes Sweet Honey).

The packaging is pretty common: a small box with my lenses inside.
 

The lenses came in their usual little plastic container...
 
...like this one (i can't find my photo of the things, sorry)

Some technical info:
Diameter: 15.0mm
Water Content: 45%
Base Curve: 8.6mm
Life Span: 3 months disposal

So i opened the package and i’ve cheated a little! The medical advise when you buy a new pair of lenses is to not wear them in the moment you open the sealing! You need to take the lens from the container, clean the lenses with a saline solution and put them in your lens case (in plenty saline solution, of course) for at least 8 hours before you wear them for the first time. But i haven’t done that! What could have happened? (And thank God nothing bad happened!)

I need to tell you guys these lenses are divine! It’s way too easy  to put them on ( because they are so big, i guess) and to take them off. You can’t feel them in your eyes! They are SO confortable to wear! They’re too cheap for this comfort! Almost like a bargain!
The design is cute, the surrounding margins of the lens in darker which is good.
    
These attributes draw the attention of the watcher directly to your eyes! The color is the same with my eye color so it blends well
   
Left eye with lens, right eye without lens (you can see in a HUGE difference)...

Of course, you can’t wear them everyday (if you don’t want to get a lot of awkward stares). They are great for parties, cosplay, themed photoshoots...
  
Me wearing my circle lenses (I look a little bit crazy, i know :P)

As for make-up that goes with lenses...i’m thinking extreme! A lot or some weird no-make-up make-up (kind off). A lot of make-up means wearing strong colors and crazy eyelashes. For “no-make-up make-up” i’m thinking of using just white foundation and white mascara.

All in all i’m truly satisfied with my choice! A high quality pair of lenses for a (very) cheap price!